Showing posts with label free. Show all posts

Wednesday, December 26, 2012

Handprint Christmas Tree

I'll admit, I have no "during the project" pictures for this one, because we did this while T was at work and I'm not Superwoman. Painting my toddler's hand and doing the handprints was job enough for me without trying to take a picture of it, too :)

WHAT YOU NEED:
     - green paint
     - paper bag or large construction paper
     - yellow paper or paint
     - baby hand (baby is optional)

There is a hard way and an easy way to do this. Let's say I learned the hard way. Set the paint and paper up and paint your toddler's dominant hand liberally. You want to make sure you have enough room to do three handprints across the bottom. Reapply paint as needed. Top the bottom row with 2 handprints in the middle row. Follow with one handprint on the top. Let dry and add a star (paint, paper, whatever you choose) and a tree trunk, if desired.


Red Christmas Tree

This craft uses a left over template from some Christmas gifts I made and leftover poms from several other crafts we have done. Roo loved that the tree wasn't green like it usually is. She finds it funny when things are silly colors.

WHAT YOU NEED:
     - 1 cardboard "tree" shape
     - red paint
     - tacky glue
     - a few poms

This craft is really plain and simple. Let your toddler paint the tree to their heart's content. Let dry for a few minutes.


Let your toddler decorate with poms and glue. Roo says "boop" with each pom she adds :)


Old Christmas Card Ornaments

Did you get so many Christmas cards this year but don't want to just toss them in the trash when the season is over? That's my problem too... Here is a great way to reuse them and turn them into seriously cute ornaments.

WHAT YOU NEED:
     - old cards
     - large circle (bowl, lid, etc.) to trace around
     - glue
     - glitter
     - hole punch
     - string

You can choose the size of your ornaments by tracing any circle you can find, large or small. Cut out (or if you have an older kid, have them cut out) the circle, and punch a hole at the top. Draw many thin circles of glue around the outer edge. Let your child go to "Glitter Town" as we call it. Apply extra glitter to allow for some falling off along the way.


Let dry and thread the string through. You are done! I love these :)


Spaghetti Ornaments

This one is pretty unusual but my girl loved it!

WHAT YOU NEED:
     - 1 cup cooked spaghetti
     - red and green paint
     - glue
     - waxed paper
     - glitter (optional)

Mix about 1 tsp paint and 1 tsp glue with half of the spaghetti, and do the same with the other color and other half of the spaghetti. Draw two circles on the waxed papers and have your toddler transfer the noodles to the 2 circles and arrange them however they want! If you want to add glitter, do so when the paint is still wet.


Let dry overnight or longer. Add a string through a strong part of the ornament and hang on the tree. Now, these aren't the most "attractive" ornaments we've made, but Roo sure had a ton of fun messing around in the noodles!


Finger Print Candy Canes

These are so cute and fairly easy. They make great gifts, too!

WHAT YOU NEED:
     - Scrap paper
     - red and white paint
     - baby finger (possibly the baby, as well)

Paint your child's index finger with red paint and have them press their fingerprint in the shape of a cane, leaving space between for the white prints. Wipe off the red paint and redo with white! I would plan on making extras in case your little one accidentally messes a few up, like mine did :)


 How cute are these?


Monday, December 24, 2012

Winter Sky

Another simple, quick, hands off craft.

WHAT YOU NEED:
     - white paint
     - snowflake stamp
     - 1 sheet blue paper
     - silver glitter (optional)

No prep needed, just set your toddler up with some paint in a shallow dish and let your little one stamp, stamp, stamp. If they end up with globs of paint, that's good! Let them shake some glitter on there and it becomes even more magical!


Friday, December 21, 2012

Touch and Feel Winter Scene

I saw this on a blog a couple weeks ago and thought it was adorable. It actually went really well too, which I didn't think would be the case! This craft has many different textures to stimulate your toddler's curiosity.

WHAT YOU NEED:
     - 1 sheet cardstock or cardboard
     - 1 blue construction paper sheet
     - yellow and green paint
     - 1/4 cup rice
     - 5-6 cotton balls
     - glue

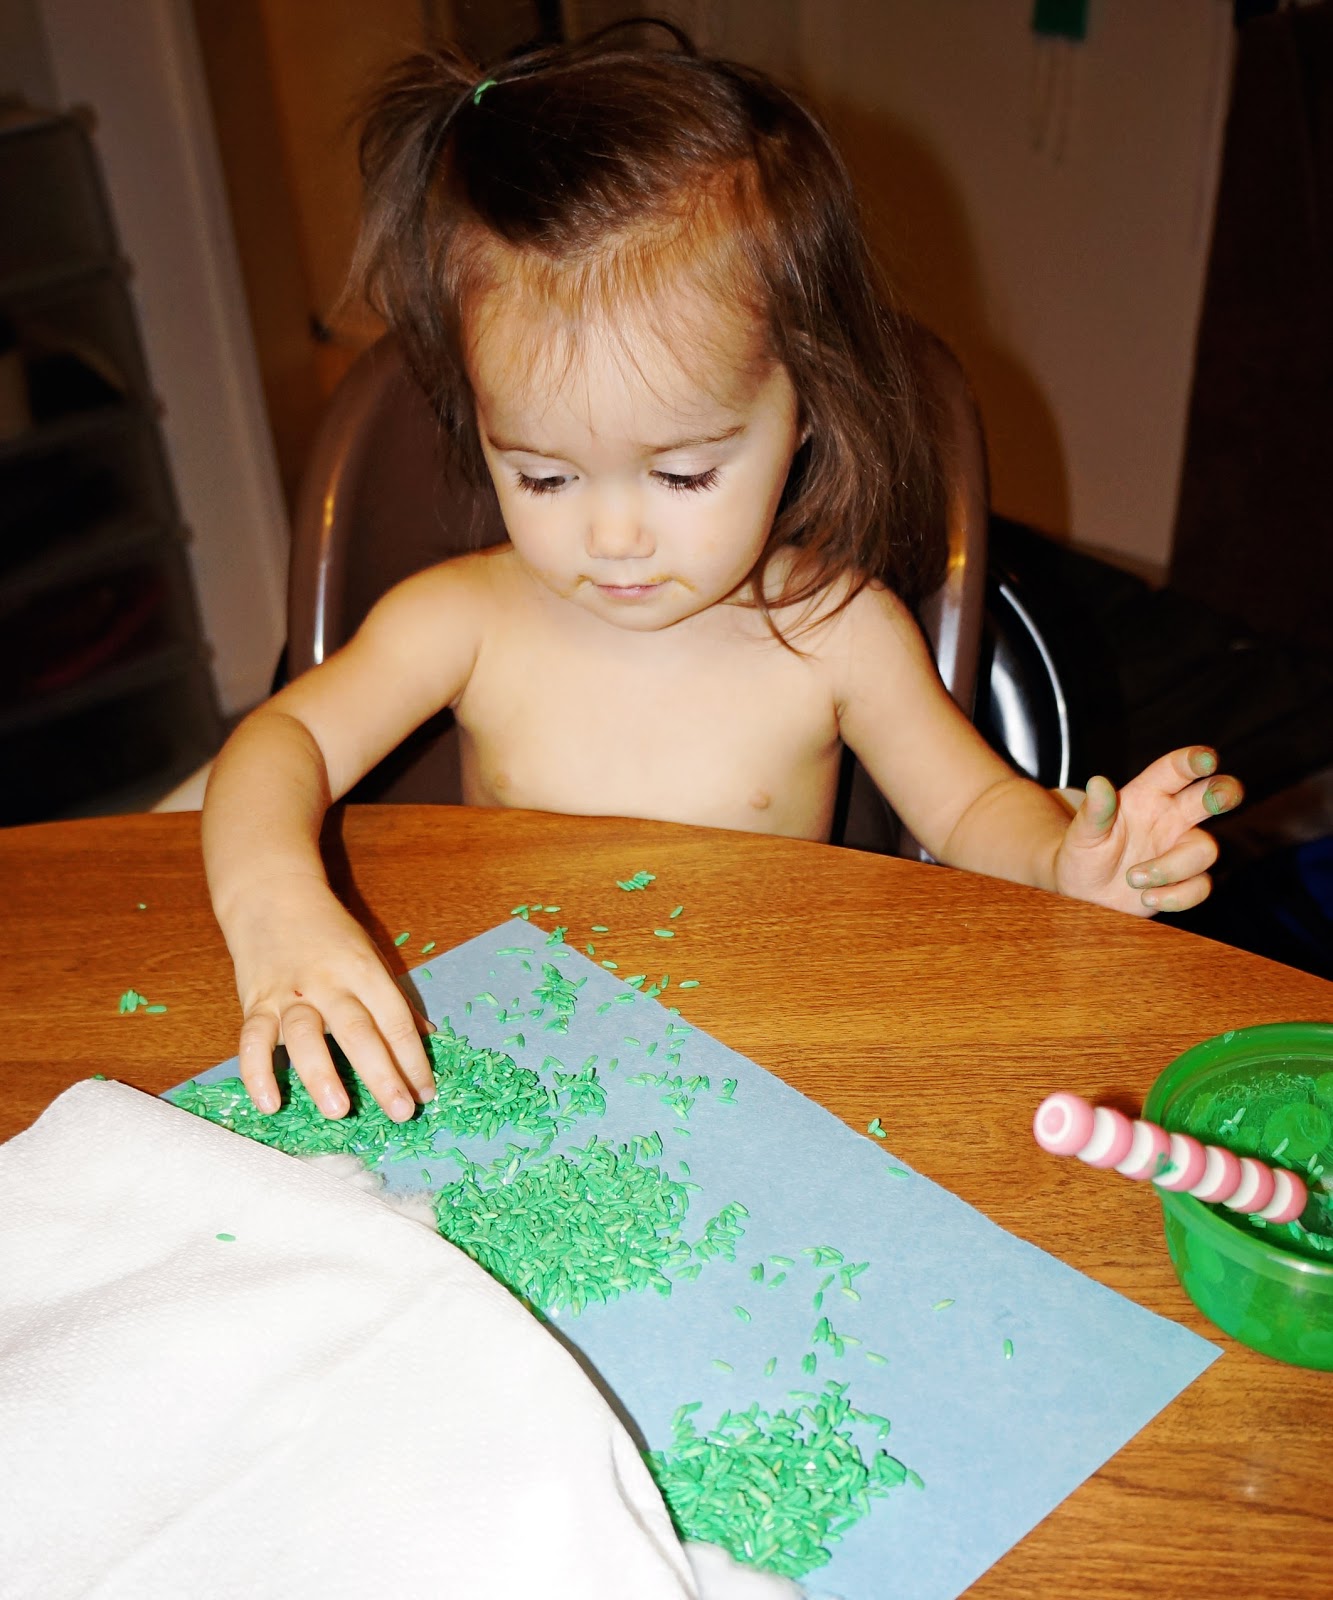
Before you begin, you need to color the rice with a few drops of green paint. Spread the rice out and let dry for about a half hour. Affix the construction paper to the cardstock or cardboard.

Now it is time for the fun! Apply the glue for the land and horizon. Tear the cotton balls into smaller, fluffier pieces and allow your toddler to cover the "ground" with them.


Paint the glue on in the shape of a tree using a q-tip. 2-3 trees should be enough. Allow your toddler to pat the rice onto the glue, the more the merrier! Shake off the excess.


And lastly, have your toddler paint a little circle of paper with yellow paint (or even, gold glitter glue if you want to be a little sparky) and, when dry, glue it to the sky section of the board.


There you have it!


Thursday, December 20, 2012

Bubble Wrap Christmas Tree

This is a super cute, really easy craft. Also, you can adapt it for so many different Christmas themes (Santa, Wreath, etc.) and colors.

WHAT YOU NEED:
     - Bubble Wrap
     - Paint and brush
     - construction paper or paper bag

Before you begin, cut out the shape of the Tree. Set your child up with the Bubble Wrap and paint and instruct them to cover the wrap with paint. Let them play around with this for a while, the more paint the better.


Place the Tree on top of the Bubble Wrap and press firmly. Your child can help rub the back of the Tree to transfer the paint. Gently remove the tree and let dry.


If you want, you can decorate the tree or add a cute star on the top like we did (ok, I did that part haha).


Handprint Wreath

This is a great little activity to track the size of your child's hand each year, but be ye warned- This is more work for the parent than for your child ;) But well worth it, I think.

WHAT YOU NEED:
     - green paper (2 or 3 sheets)
     - tacky glue
     - small paper plate
     - red puff balls
     - red string (for bow)
   
Cut the middle out of the paper plate to form the base for the wreath. Trace your child's hand on the green paper. You will need about 10-12 hands cut out. Let your child paint glue on the paper plate and stick the hands to the plate to form the wreath. Let dry.


Now let your child decorate the wreath with glue and red poms, then add a bow at the bottom.


Again, let dry. You're done!


Wednesday, December 19, 2012

Recycled Glitter Ornaments

After wrapping all the Christmas presents and cooking the dinner, we had a lot of ribbon spools and plastic lids left over. So we put them to good use!

WHAT YOU NEED:
     - left over lids or ribbon spools
     - spray paint primer
     - glitter glue
     - 4 4-6 inch ribbons

Before you being, punch/cut/drill a hole in any materials that don't already have one. Spray the spools and lids with paint primer and let dry completely. Let your toddler make their own creations with mixing colors and techniques using the glitter glue. Roo couldn't quite figure out how to draw with the glue so we switched to painting, which she did really well.


After the ornaments are covered, let dry. Add the string and hang.


After the ornaments are covered, let dry. Add the string and hang.

Saturday, December 15, 2012

Thumbprint Christmas Lights

DAY THIRTEEN:

Super excited about this craft. This is something you can redo every year and see how your child grows!

What you need:
     - acrylic or finger paint (at least 4 colors)
     - sharpie
     - 1 baby thumb (if the rest of the kid is attached, that works too)
     - paper

Before you start, draw a squiggly line from one end of the paper to the other. This will be the strand for the lights. Put only a few drops of each color of paint in a shallow container. We used baby food lids and introduced only one color at a time to avoid mass chaos making a mess. Depending on how old your child is, they can do the next part on their own or you can help them. Dip your toddler's thumb or index finger in the paint and position the print just above the strand line. Do a few of each color.


Let the paint dry completely. For us, this turned into a perfect opportunity to make a family painting, using the rest of the paint. Roo hijacked all artistic attempts and we turned out with this masterpiece! 


After the paint has dried, ground the floating light bulbs to the strand. I added Roo's name, age, and the date so we can keep this as a memory :)


Tuesday, December 11, 2012

Recycled Reindeer

DAY TEN:

Today is another project using leftovers. I just wrapped all the Christmas presents with paper grocery bags (cute, free, and good for the earth!), and I had all the handles left over. I knew I could use them to make a cute craft, so I created this reindeer.

WHAT YOU NEED:
     - Paper plate
     - 1 red pom (or reuse a lid and paint it red)
     - 2 grocery bag handles
     - brown craft/acrylic paint
     - 2 quarter sized white circles
     - 2 hole punch sized black circles

This is another quick and easy project. Set your toddler up with a small amount of brown paint and a brush. Loosely tape the plate to a paper bag to avoid getting paint on your table. Let your little one paint the plate to their heart's content.

Time to take a break while the paint dries a little. Then, apply the glue in the right place for the nose and eyes to go. Let your little one put the nose and eyes in place. Your reindeer might end up with googley eyes if you don't turn them to face the same direction. Again, let dry.


 Meanwhile, you have to do some antler-makin'. Unfold the bag handles and cut one in half. Use tape or glue to position the 2 halves on the 1 whole, as seen below. Staple the antlers to the back of the plate and paint over the staple marks to hide them. There you have it!


AFTERTHOUGHT: You could totally make this into a mask by attaching a stretchy cord to the sides and cutting out eye holes. How fun! We will do this after the holidays are over.

Friday, December 7, 2012

Grocery Bag Wreath

DAY SEVEN:

This is a free craft, made from left over bits of other crafts we've done this week. There is always a way to reuse things from other projects, so never throw scraps away! I also have, like, 50 paper grocery bags stashed away, just waiting for a purpose. I adapted this craft to use paper bags instead of paper, and I love how it turned out.

WHAT YOU NEED:
     - 1 paper grocery bag
     - green construction paper cut into 1 inch squares (from Christmas Paper Chain)
     - red felt squares cut into 1/4 squares (from Felt Stocking)
     - 1 pipe cleaner (from Pipe Cleaner and Bead Candy Cane Ornaments)
     - tacky glue
     - paint brush

Before you begin, you need to make the bow for the wreath from the pipe cleaner. You also need to cut out the outline of the wreath from the grocery bag. To do this, trace a large dinner plate for the outer ring and a bowl inside for the middle ring. Cut out the area where the bowl was and the area outside where the plate was, so that you end up with an "O" shape. Also, keep one of the handles from the bag to use as the wreath hanger.

Now, set your child up with a bowl of green squares, a bowl of red squares, and a paint brush. I loosely taped the wreath outline to another grocery bag to prevent glue from ending up on the table. Apply the glue to the wreath and let your toddler spread it around with the paint brush. This was Roo's favorite part.


Then have her place the green squares around the wreath however she desires.


When the wreath is covered with green squares, dab a few dots of glue on top. Have your child place the red squares on the dots of glue.


To finish it off, glue on the bow and the handle (on the back side) and your craft is complete!


Tuesday, December 4, 2012

Cheerios Garland

DAY FOUR:

Threading activities are so great for developing fine motor skills! This actually worked out perfectly for us, we have 4 boxes of Cheerios right now... Also, I think I should warn you to feed your child before making this garland. We did this when Roo was hungry and, as you can imagine, most of it got eaten.

WHAT YOU NEED:
     - about 1/2 cup of Cheerios
     - fishing line, shoe lace, or other string

Set your toddler up with a bowl of the Cheerios and the string. Roo is very familiar with threading things (we have a wooden bead set that she uses often) so she knew exactly what to do. If your little one hasn't done this yet, show him how to thread the string through the Cheerio a few times and he should catch on. When your child the string is full of Cheerios, tie the ends off and have them wrap it around the Christmas tree!


VERDICT: Well apparently Roo was starving because she ate the "garland" like a candy necklace. Perhaps I should rename the activity Cheerio Necklace?
At any rate, she had fun, and it was free! Win-win for us :)