Friday, October 3, 2014

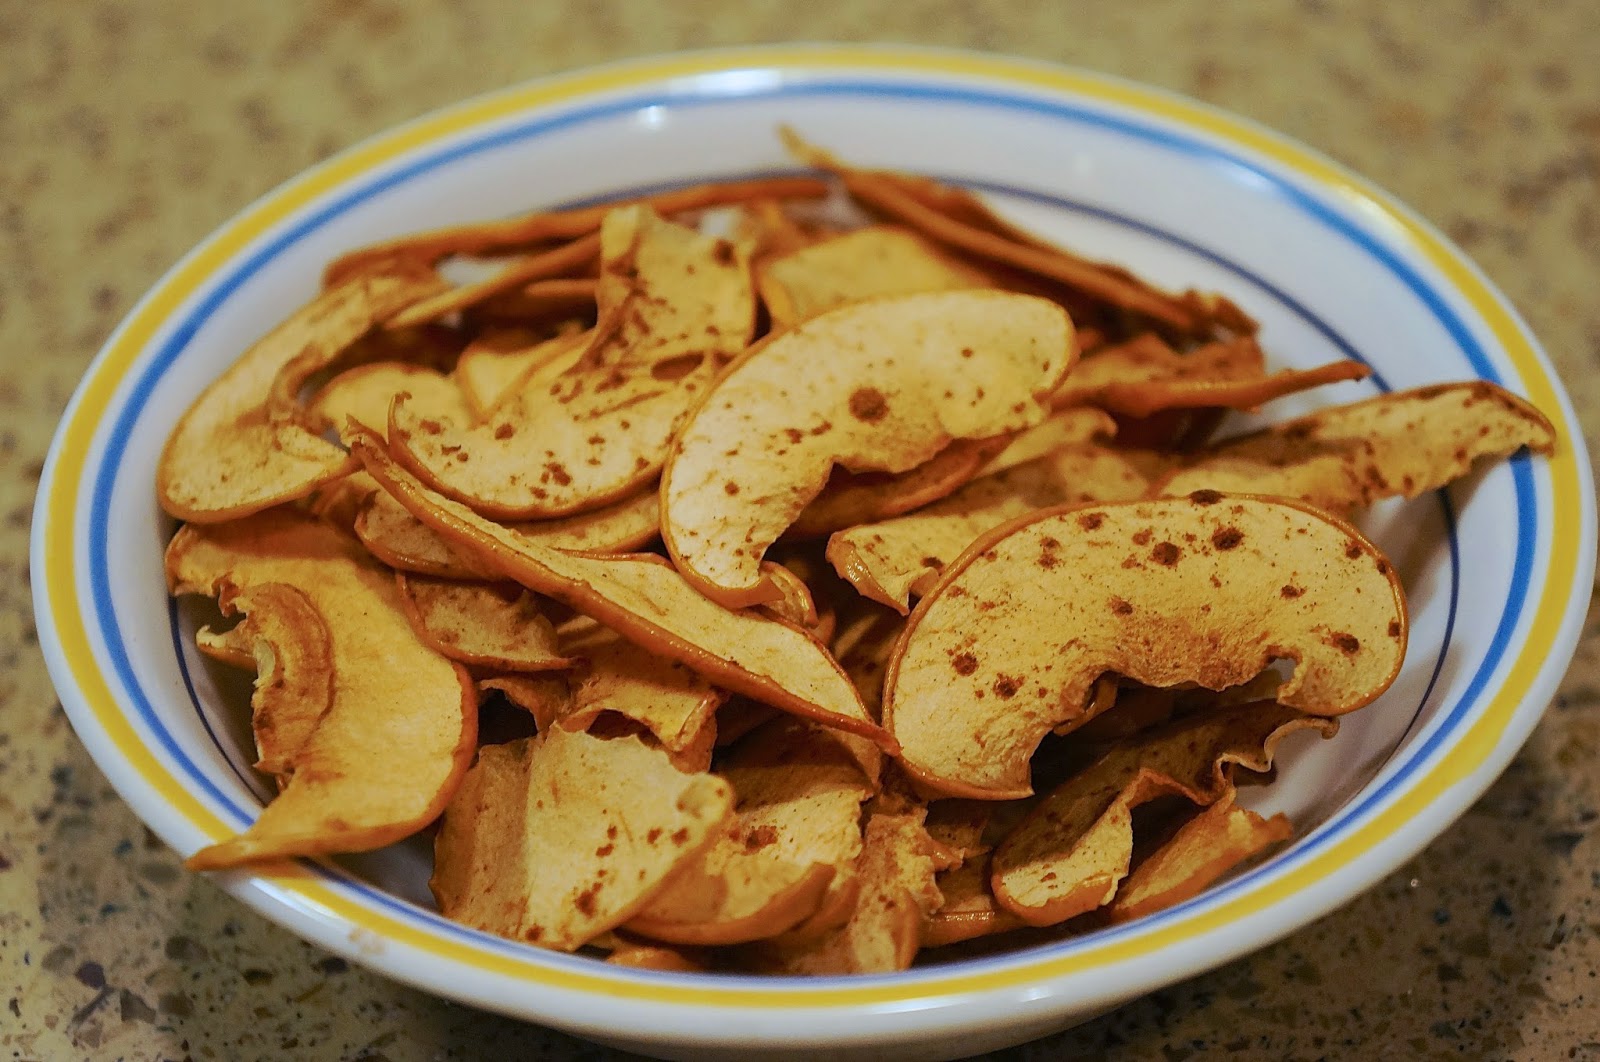
Apple Chips (Vegan, GF, paleo, clean)

Roo is totally into granola these days… I've been trying to find ways to make it more interesting than just oatmeal versions. We had a bunch of apples I didn't know what to do with, so I though I'd take a stab at drying them out for apple chips to add to granola. Here goes nothing!


Ingredients:
2 apples
1-2 cups of water
3 Tablespoons Lemon Juice


Slice the apples pretty thin, but not so thin you chop your fingers off… no one likes bloody apples. Put them in a bowl and cover with water and lemon juice. Stir around gently to coat.
Spoon out the apples and lay out on a thick stack of paper towels to drain. (This next picture is totally useless, don't say I didn't warn you.)
This is the time consuming part: Arrange the slices on a cookie sheet with parchment paper. If you feel the need to sing at the top of your lungs along to Beyonce while doing this, then that makes 2 of us! :) 
Once you've gotten that out of your system and all the apples are lined up on the sheet, bake at 170 for about 5 hours. This would be a good time to clean your filthy house, or better yet, catch up on the Real Housewives. After 5 hours, flip the slices over and turn the oven off. Return them to the warm oven and let them sit overnight. The next morning they will be crisp! If you are making them for your toddler, you may now smack yourself for taking that long to make your 3 year old a snack that now all the sudden she doesn't want anymore. Facepalm. Oh well, more for me!

Happy Eating!!


Apple Cinnamon Quinoa with Almonds (Paleo, Vegan, GF, Clean)

So I've discovered that being vegan is one of the most delicious lifestyles ever, despite common misconceptions that veganism means eating leaves all day. I'm in love with so many of recipes that I will be posting soon. I hope you'll try them and discover a few new favorites as well! Today, I had what my co-worker referred to as "Apple Crisp" for breakfast. That's how good it smells and tastes… Little does he know… *Cue evil Vegan laughter*

Apple Cinnamon Quinoa with Almonds


Ingredients:
1/4 cup dairy free butter (I used coconut)
3 medium apples, peeled and diced
2 teaspoons cinnamon
1/4 teaspoon salt
1/4 teaspoon nutmeg
3/4 cups uncooked quinoa
1/4 cup brown sugar (optional)
2 cups unfiltered fresh apple juice
1 teaspoon vanilla
Dairy-free milk (optional, hemp is our favorite!)
Sliced almonds, dry cranberries/raisins (optional)

Start by "melting" the butter in a skillet. If you are using coconut butter, it won't really melt. It just gets all ooey-gooey. Add the apples, cinnamon, nutmeg, and salt. Stir that puppy up to coat every apple in goodness. Cook for about 5 minutes until the apples start getting soft.
 Add in the brown sugar, apple juice, vanilla and uncooked quinoa and stir. Cover.

 Let cook on low to medium heat for about 2 hours or until it has an oatmeal-y (ok, I made that word up) texture. Spoon into a bowl and add almonds, cranberries, raisins, more sugar, and dairy-free milk. If you are SMART like me, you'll keep the leftovers for a hassle free breakfast you can enjoy throughout the work week. Nothing like a good protein packed breakfast to get your day off to a good start!! 

Happy Eating! 

Monday, August 18, 2014

Coconut Quinoa Granola Bars (Vegan, Vegetarian, Paleo, GF)

So I don't let Roo eat her school's "snacks" since they seem to think marshmallows and chocolate chips are an appropriate snack for toddlers…. But that's a story for another time! Every week or so I make her some snacks that are actually nutritional and not filled with preservatives and chemicals and crap. She's super into granola and granola bars, so naturally, I made her some for snack time this week! I doubled the batch and brought them in to my office to let my guinea pigs, er, co-workers give them a try. They were about 50/50 on if they liked the chocolate dipped version or the plain version best. If you know me at all, you know I preferred the chocolate dipped version!

Ingredients:
1 cup uncooked quinoa
1 cup oats
1/4 cup chia seeds
1/2 coconut flakes (unsweetened)
1 cut nuts and dried fruit, optional (I used chopped almonds and raisins)
1/4 tsp salt
1/2 cup peanut butter
3/4 cup raw honey
1 Tbl oil (I use coconut)


Preheat oven to 350 degrees and grease a 9x13 inch glass baking dish. Sprinkle oats, quinoa, and chia seeds on a cookie sheet and toast in hot oven for 8 minutes.
Place into a large bowl and add coconut, nuts, and dried fruit. In a medium saucepan, combine salt, peanut butter, honey, and oil. Bring to a boil over medium heat and take it off as soon as it starts to boil. Pour it over the oats mixture and stir until it is all evenly coated.
Pour into the greased baking dish and flatten it down until the top is flat. Bake for about 20 minutes or until the top is golden brown.
Let cool for up to 2 hours and cut unto bars. If you prefer your granola bars sans chocolate… you seem boring, already. Just saying :P If you want chocolate on them, You'll need to also round up a spoonful of coconut oil and 2 handfuls of chocolate chips (real precise measurements, I know). Melt them together over low heat until smooth. Dip the bars into the chocolate and place chocolate side up on waxed paper. Let cool. Then you are ready to devour!!

Happy Eating!

Whole Wheat Italian Cheese Crackers (Paleo, Clean)

If you read my blog regularly, you know that I make snacks to send to school with Roo, since they only serve processed food with no nutrition. A while back I made these Spelt Flour Wheat Thins and sent them to school with her. They were a hit with the adults and some of her friends, but she said they made her too thirsty… Uh, please girl. The excuses toddlers come up with are so entertaining, right? Anyway, she's into cheese crackers currently so I looked up a recipe and gave it a shot. I've made them a few times now and as a warning, these take about 45-60 minutes to make, so I always double up the recipe so the batch lasts longer and I don't have to make them as frequently.
Ingredients:
1 1/2 cups whole wheat flour (or spelt, gluten-free, etc)
1/2 cup flax seed meal (or ground your own flax seed)
*If you want to substitute 1/4 cup of any flour for coconut, that's what I did*
1 cup rolled oats, blended into a fine powder
1/2 tsp salt
1/2 tsp paprika
2 tbsp finely chopped basil
2/3 cup water
1/2 cup olive oil (or coconut)
2 cups shredded mozzarella cheese, blended in a food processor into small chunks
Blend the oats into fine powder. Blend the cheese into small chunks.
Mix all ingredients until a dough forms. You may need to add a splash more water if it is too dry.
Roll out the dough on a floured surface. Try to get the dough as thin as possible. The thinner the dough, the crisper the cracker will be. If you want to be SUPER MOM: use a fun shaped cookie cutter to cut out the crackers. I did this the first time and then I realized, ain't nobody got time for that shit. If you want to retain any ounce of sanity: just cut the rolled dough into squares with a knife. Trust me, they will be just as popular in squares as they would be in stars or hearts or whatever the hell else you think your kid wants. I digress.
Place the crackers on an ungreased cookie sheet. They can be super close, almost touching, since they won't puff up at all. I lightly sprinkle salt over the sheet when it is full before popping it in the oven. Bake at 350 for 15-20 minutes. The thinner the cracker, the less time it will take. I set the timer for 15 and add on 5 minutes at a time if they aren't done. They are done when they are hard to the touch and golden brown- like me after my Hawaiian vacation :D
Let cool completely before storing or they will get soft. Enjoy! Until next time, happy eating!

Saturday, June 7, 2014

Crockpot Curry Chicken and Vegetables (GF, Clean, Paleo)

So…. I love my crockpot, but I'm not a huge fan of curry dishes. Regardless, I decided I should be a little more adventurous and try this recipe. For those of you that like Thai food, you'll LOVE this!
Ingredients:
1 pound boneless chicken (thighs, breast, tenders… whatever!)
1 onion, halved and sliced thinly
4 garlic cloves, sliced thinly
16 slices fresh peeled ginger (about 1 oz)
1 1/2 Tbspn curry powder
1 tsp ground cumin
2 tsp salt
1 package frozen peas
1 cup baby carrots
1 cup unsweetened coconut milk
1/2 cup toasted cashews (for garnish)
(I added some cilantro garnish as well, but didn't like it with the curry, FYI!)
Add chicken, onion, carrot, garlic, ginger, curry, and cumin to your crockpot. Stir to coat and cook on high for about 4 hours.
During this time, toast your cashews, if you choose to use them, under the broiler or at 500 degrees. Keep a very close eye on them as they will burn quickly!

Stir in coconut milk and peas. Cook for about 20 more minutes.
Pull the chicken out and use a fork to shred it. At this point the chicken should pretty much fall apart when you so much as look at it… so it shouldn't take too much effort. Return it to the crockpot and stir to coat.
I served mine over brown rice and garnished with cashews and cilantro. As I mentioned before, I wouldn't recommend using cilantro- the flavor profile got confusing with curry and cilantro. I was all like, "Am I eating Thai or Mexican? ….Thaixican? Weird." With that being said, the dish was actually pretty good. And very easy! I made it for my parents and they LOVED it (they are huge Thai fans). If you make this recipe, let me know what you thought! :)

Until then, Happy Eating!

Wednesday, May 21, 2014

Quinoa Tater Tots

I got this recipe from my friend, Rachel, who is seriously such an inspiration to me. She recently lost 100 pounds by revamping her entire lifestyle. So, naturally, I really admire the changes she has made and she definitely keeps me focused on WHY we choose this lifestyle and what AMAZING benefits come from treating your body properly. Ok, enough gabbing... Here is my version of the insanely savory recipe for Quinoa Tater Tots!!
 
Ingredients:
2 c cooked quinoa (I had red on hand so that's what I used)
1 onion, very finely chopped
5 mushrooms, very finely chopped
3/4 c four (I had spelt flour on hand, or you can use a GF flour)
1/4 tsp red pepper flakes (more if you like it spicier)
1 tsp salt
3 Tbsp non-dairy milk (or whatever you have on hand)
1 Tbsp lemon juice
Mix together the cooked quinoa, onion, mushrooms, flour, red pepper flakes and salt.  Keep mixing until it is totally combined and starts to get sticky.
Add the lemon juice and milk and mix again. It should be pretty sticky. If you need to add a splash more milk to get it to the proper consistency, do so- but be careful not to over do it!
Roll into small balls (I used the large end of a melon baller, but a mini ice cream scoop would work, too.) and refrigerate for about 15 minutes.
Heat a small amount of oil in a large pan. Add the tots and brown on both sides. I found it helpful to smash them a little flatter to get a nice brown on them. It should take about 5 minutes per side.
These suckers are straight delicious... I couldn't stop eating them! They have the perfect mix of spicy and savory and crispy, but without the guilt that comes with fries or regular tater tots. This recipe is definitely going in my recipe box!
 
Happy Eating!!


Sunday, May 18, 2014

Spelt Flour Wheat Thins

So I have all these random different flours around my house from trying various products when I did a gluten cleanse last month. No joke, SO. MANY. FLOURS. Coconut, spelt, rice, oat, almond, flax… Sheesh. Luckily, this was the perfect recipe for me to start using up some of the extra bags I have laying around.  I made this recipe with some pretty "unusual" products, so if you don't have any of them, please feel free to substitute for regular flour, sugar, butter, etc. depending on your dietary needs and what you have on hand!
 
Here is the Spelt Flour Wheat Thins recipe as I made it:

Ingredients: 
2 c spelt flour (or whole wheat, almond, white, rice, etc.)
1/2 c coconut flour (or WW, almond, white, rice, etc.)
1 Tbsp. coconut sugar (or stevia, regular sugar, etc.)
1 tsp. paprika
8 Tbsp. coconut butter (or regular butter)
1/2 c water
1 tsp. vanilla
First, combine all dry ingredients and whisk until completely blended.
 Cut the butter into the dry ingredients, using a fork or pastry cutter. This takes a while, be patient and make sure there aren't any little chunks or it will change the texture of the cracker.

Add the vanilla to the water and slowly add to the mixture. Use the pastry cutter to completely incorporate. This also takes several minutes- make sure you are mixing until a crumbly dough forms. It should look like the picture below. If you need to add more water, add 3-4 tablespoons at a time until the dough is moist enough (I added about 7 Tbsps more, but this will vary). Remember this is a cracker recipe, not a cookie recipe, so the dough won't be as soft as you are used to seeing with cookies.
Once you have a dough, roll it out as thin as you can- remember this is going to be a cracker so we want to get it crunchy/crispy!  If you want to be cute or have a picky eater, cutting the crackers into fun shapes is a good idea. Otherwise, you can save yourself a few minutes and just cut into squares with a knife. (Definitely skipping the shapes next time. They are adorable but oh so time consuming!)
Arrange crackers on a cookie sheet and bake at 400* for about 10 minutes. Watch them carefully! Ovens can vary slightly and cooking time will be shorter the thinner your crackers are (and longer for thicker crackers). Mine took about 15-17 minutes since my oven cooks a little cooler than most.
Let them cool completely before storing or you will end up with soft, soggy crackers- aka NO FUN :( My finished product tasted EXACTLY like the store bought Wheat Thins. I was shocked, actually! All the goodness without any artificial ingredients or preservatives. Score! Be on the lookout for another similar post on how to make Homemade Goldfish Crackers!! But until then..

Happy Eating!!


Friday, May 16, 2014

Black Bean Brownies

Ok so I haven't posted in ages… But I've been so obsessed with trying new super healthy recipes, specifically desserts, that I needed a place to catalog them all! I am constantly being asked for tips and recipes for eating natural real foods, dairy free, sugar free, adding more vegetables, etc. I thought I might as well blog about my food experiments so I can easily share them with those just embarking on this journey.

Tonight I made these awesomely easy Black Bean Brownies. Let me just say, sometimes I wonder why everyone doesn't eat like this when it is so easy and so delicious. It should also be noted that as I type this, I have an entire plate full of these on my lap, because.. well, chocolate. 'Nuff said.

First, we have our ingredients. Feel free to substitute based on  your dietary needs and what you have on hand. One of the things I love most about cooking in this lifestyle is how easy it is to change things up based on your needs!  Here is the recipe as I made it:

1 15 oz can of black beans, rinsed, or 1.5 cup dry beans, cooked
1/2 cup raw cocoa (100%)
1/4 cup coconut oil, melted
1/2 cup honey (or agave, sugar, coconut sugar, etc)
1 tsp vanilla (though in my house we triple the vanilla in everything)
3 eggs
1/2 cup flour (I used gluten free, but whole wheat, almond, coconut, etc. would all work, too)
1/4 tsp salt
1/4 cup chocolate chips (optional)

This recipe is fool proof... all you do is through it all into a bowl and mix it together! If you can't handle that, I'm not sure I trust you in the kitchen ;)
I didn't puree the beans this time so this is how the batter looks. Next time I will puree them before mixing it together so I don't have whole beans, though I really didn't mind them. I should note that I made a last minute decision to add a handful of chocolate chips before baking. Turns out this was a REALLY good idea. I always feel like more chocolate is a good idea.
Pour into a greased 8x8 pan and bake at 350 for about 40 minutes. It will be easy to tell when they are done because the top will have a slight crisp to it.
I mean... really... just look at this deliciousness.
So after trying these, I am 100% convinced black beans should be in the baking aisle at the grocery store. I would definitely puree them next time, though. I got to thinking about how easy it would be to come up with different varieties of these brownies... Of course, my brain went right to coconut almond (Almond Joy Black Bean Brownies?? Heaven!), but a friend mentioned macademia nuts as well... The possibilities are endless! These will definitely be a staple for my family and I'll post a new variety when I make them next! Until then... Happy Eating!!